RSS

Monthly Archives: March 2015

Chocolate Avocado Pudding

Chocolate Avocado Pudding

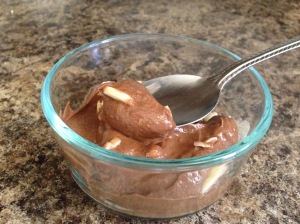
It seems like one of the latest food makeovers is chocolate avocado pudding. I keep seeing it everyone I go online when I’m searching for recipes. Avocados have TONS of health benefits and they just happened to be on sale at Aldi’s this week for $0.68 each – basically a steal. I went early Sunday morning before the crowds, so I had a nice selection of ripe and unripe to choose from. I wasn’t sure how the pudding would turn out, but if it was tasty, we’d have a nice stockpile of avocados to choose from 🙂

I couldn’t find a recipe that was quite what I wanted, but made my own after looking at a few. The results – a.m.a.z.i.n.g. It doesn’t taste a thing like avocado (if you can say avocado really has a taste). Just like straight-up whole milk, dark chocolate pudding. It was so rich and creamy! Since there isn’t added sugar, I didn’t feel bad letting Eli lick the bowl with me. He was begging for more when we finished up.

2015-03-30 12.52.57

Chocolate Avocado Pudding

2015-03-30 12.57.16Ingredients

  • 2 ripe avocados
  • 1/2 cup cocoa powder
  • 1/2 cup dates or dried fruit puree (I used sunsweet lighter bake)
  • 1 tsp vanilla
  • 1/2 cup milk
  • 1/4 cup – 1/2 cup water (based on your desired consistency)
  • Slivered almonds, crushed peanuts, or fresh berries for toppings

Directions

  1. Peel avocados and remove pits. Place in food processor.
  2. Add remaining ingredients to food processor, except water. Process until smooth (about 2 minutes)
  3. Add water to thin to desired consistency. Remember it will thicken a bit when chilled.
  4. Pour into a large glass bowl for storage or individual serving bowls. Chill for at least an hour.
 
2 Comments

Posted by on March 31, 2015 in Nutrition


Tags: , , ,

Infant Iron Muffins

Eli enjoying his iron muffins with grapefruit (citrus increases iron absorption!)

Eli enjoying his iron muffins with grapefruit (citrus increases iron absorption!)

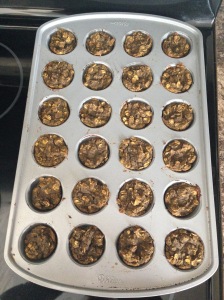
As I’ve mentioned before, I started Eli on a hybrid of BLW. I have a little issue with messes, so baby cereal wasn’t really on my radar for a BLW item. While he was getting some red meat and spinach, his iron intake was pretty minimal. I am breastfeeding, so by 6 months he really needed an iron supplement. I did introduce some spoon-fed iron-fortified cereal, but there were so many other real foods I wanted to give him, that I decided to get him an iron supplement. Well, until he tried the supplement – and proceeded to vomit it everywhere (and stain his cute PJs). So, back to the iron cereal, right? Wrong. Turns out I can’t make it thick enough for him anymore – if it’s thin, he gets mad he can’t chew it and just plays with it in his mouth, spitting out most of it. And he’s started to grab the spoon to feed himself. Which works great when something solid is on the spoon, but not so great when it’s a runny mess. But then it hit me – make infant cereal muffins. I did a little search and there are a few people out there who have done it already, but none of them put iron supplement in theirs. I asked an RD friend who confirmed I could cook with the supplement, so I was set. The end result – nothing you’d buy in the store, but perfect for Eli. It was bland (which is what you want for infants) and had a strange greenish-brown color, but it didn’t taste much like iron and he loves them. I put them in mini muffin tins, so he is able to handle the whole muffin all by himself. Each one has about 75% of his daily iron needs, so I’m satisfied with not having to force feed him any other iron supplements. I kept 5 out for the week and froze the rest, with the plan of just taking them out when I need them.

 iron muffins (4)Baby Iron Muffins
Makes about 30 mini muffins

Ingredients

  • 1 cup baby cereal (I used happy bellies multigrain)
  • 3/4 cup old-fashioned rolled oats
  • 1 15oz-can pumpkin puree (not pumpkin pie filling)
  • 2 eggs
  • 1 tsp baking soda
  • 1 tsp cinnamon
  • 1/2 cup applesauce
  • 1/2 cup butter or coconut oil
  • 15ml liquid iron supplement

Directions

  1. iron muffins (3)Preheat oven to 375F. Spray a mini muffin tin with cooking spray
  2. Mix cereal oats, baking soda, and cinnamon together in a medium bowl.
  3. Cream butter and eggs in a large bowl. Mix in pumpkin, applesauce  and iron supplement together. Fold in dry ingredients.
  4. Spoon batter into each muffin cup. Bake for 20-25 minutes, or until a toothpick comes out clean and the edges are pulling away.

Notes
– I noticed that these took awhile for the center to be completely done. Be sure the tooth pick comes out clean! If you used instant oats instead of old fashioned you might have better luck – let me know if you try this!

– Technically babies aren’t supposed to have eggs until 1 year – use at your own risk.

 
Leave a comment

Posted by on March 29, 2015 in Nutrition


Tags: , , ,

Veggie Burgers

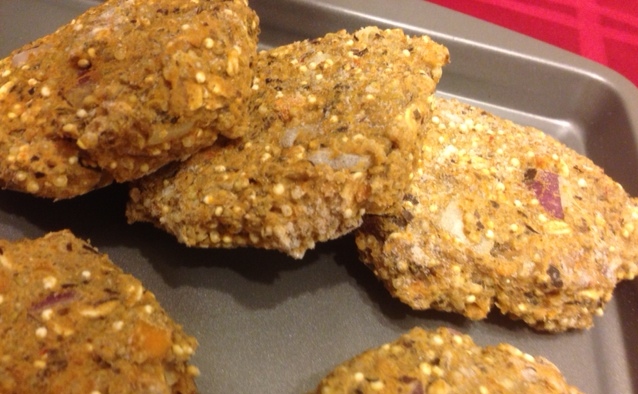
While I’m not a vegetarian, I really enjoy vegetarian foods. Veggie burgers are one of my favorites because they often highlight delicious vegetarian flavors and are so versatile. In addition to eating them as a burger you can put them on top of salads or crumble them in egg scrambles. Store-bought veggie burgers often are full of salt and additives, so I prefer to make my own. They can be a little time consuming, so I prefer to make a bunch of them and freeze them for use later. I had a.m.a.z.i.n.g. walnut veggie burger at Jac’s in Madison and decided it was time I tried a few few new recipes. These burgers turned out great. J and Eli love them too!

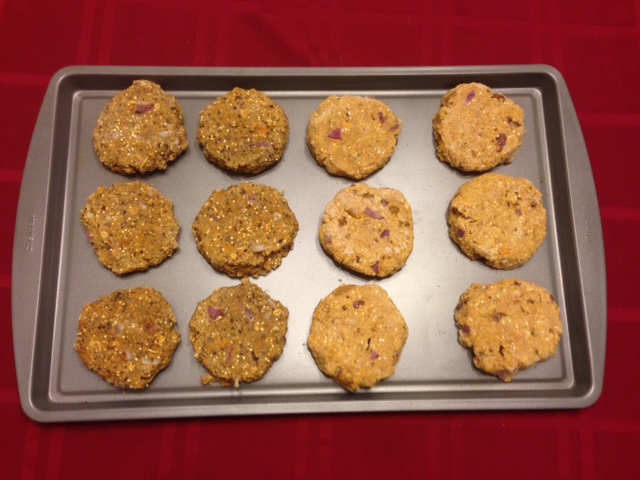
These burgers can be prepped and frozen to be cooked fully from frozen when you are ready. Another option that saves a lot of time later is to prepare them fully, let them cool, and them freeze them individually. The latter option allows you to just warm them up in the microwave, on a GF grill, or in a skillet when you are in the mood. It saves a lot of time and is less messy since they are fully cooked already.

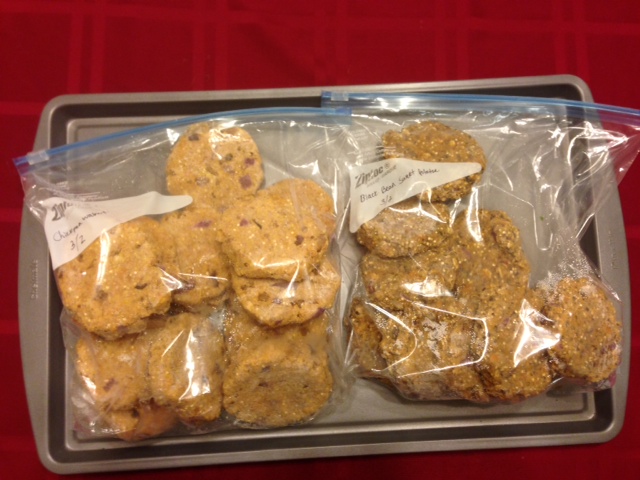
The key to freezing these is to line a baking sheet with wax paper and place the burgers on the paper individually. Be sure they are not touching. Put this in the freezer for about 2 hours, or until the burgers are hard. At this point you can remove them from the paper and place them in a freezer bag. It is critical that you do it this way so the burgers are individually frozen. If you don’t the burgers will freeze stuck together. This isn’t a huge deal if you plan to thaw them all at once, but it makes it impossible to remove individual burgers from the freezer. It is also a problem if they aren’t pre-cooked, because they will need to be thawed and then they will just a be a big pile of mush. This approach of freezing individually has been a live saver and can be used for anything you are freezing. We use it all the time in the summer when berries are in season!


veggie burgers-blackbeanSpicy Sweet Potato and Black Bean Burgers
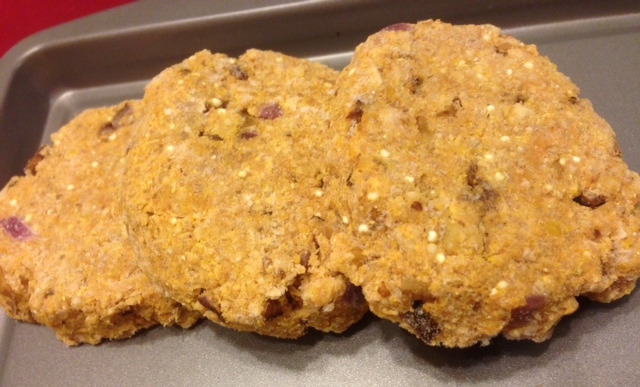
Recipe from Ambitious Kitchen


veggie burgers-chickpea walnutChickpea-Walnut Burger
Recipe Adapted from Big Mike Eats

veggie burgers3veggie burgers2


2 Comments

Posted by on March 24, 2015 in Nutrition


Tags: , , , , , , ,

The 50 Healthiest Foods of All Time (With Recipes)

The 50 Healthiest Foods of All Time (With Recipes)
 
Leave a comment

Posted by on March 18, 2015 in Uncategorized